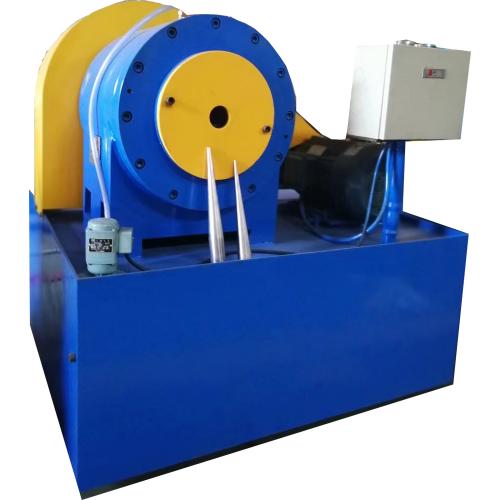
How to use the pipe tapering machine?
Pipe tapering machines are essential tools used in various industries for creating tapered ends on pipes, allowing for easier connection and installation. These machines automate the tapering process, improving efficiency, precision, and overall productivity. In this article, we will provide a step-by-step guide on how to use a pipe tapering machine effectively, ensuring optimal tapering results and safe operation.
Step 1: Safety Precautions Before operating the pipe tapering machine, ensure you have read and understood the manufacturer's instructions and safety guidelines. Wear appropriate personal protective equipment (PPE) such as safety glasses, gloves, and protective clothing. Ensure the machine is properly grounded and positioned on a stable surface.
Step 2: Prepare the Pipe Inspect the pipe to be tapered for any defects, such as cracks or dents, that may affect the tapering process. Ensure the pipe is clean and free from debris, rust, or other contaminants. Measure and mark the desired taper length on the pipe using a measuring tape and marker.
Step 3: Set Up the Machine Adjust the machine settings according to the desired taper angle and length. Consult the machine's user manual or follow the manufacturer's instructions to set the appropriate parameters. Secure the pipe in the machine's clamping mechanism, ensuring it is aligned correctly and firmly held in place.

Step 4: Tapering Process Start the Tube tapering machine and gradually initiate the tapering process. The machine will begin rotating the pipe while a cutting tool or die gradually removes material from the pipe's end, creating the tapered shape. The cutting tool or die should be properly aligned with the pipe to ensure a consistent and accurate taper.
Step 5: Monitor the Process Carefully monitor the tapering process as it progresses. Observe the machine's operation, ensuring the cutting tool or die is functioning smoothly and not causing excessive vibration or chatter. Pay attention to the pipe's alignment within the machine's clamping mechanism, making any necessary adjustments to maintain proper positioning.
Step 6: Inspect the Tapered End Once the tapering process is complete, stop the machine and carefully inspect the tapered end of the pipe. Check for any imperfections, such as rough edges, irregularities, or deviations from the desired taper specifications. Remove any burrs or sharp edges using a deburring tool or abrasive material to ensure a smooth and clean finish.
Step 7: Post-Tapering Checks After tapering, measure the tapered end's dimensions to ensure it meets the required specifications. Verify the taper angle, length, and diameter at various points using appropriate measuring tools. Conduct a visual inspection to ensure the taper is uniform and free from defects.
Step 8: Cleaning and Maintenance Clean the machine and remove any debris or swarf generated during the tapering process. Follow the manufacturer's instructions for proper maintenance, including lubrication, belt tension adjustment, and periodic inspections. Regularly inspect the machine for any signs of wear or damage and address any issues promptly.
Conclusion: Using a pipe tapering machine requires proper setup, careful operation, and post-tapering inspections. By following the step-by-step guide outlined above and adhering to safety precautions, you can effectively create tapered ends on pipes, facilitating easier connection and installation. Remember to consult the machine's user manual for specific instructions and guidelines provided by the manufacturer. By using a pipe tapering machine correctly, you can achieve accurate tapering results, enhance productivity, and ensure safe and efficient pipe assembly in various industrial applications.


